Step-by-step guide to connecting a SuperHosting domain to a Heroku app, configuring DNS, and enabling an SSL certificate.
Do you want your site on Heroku to work with your own domain from SuperHosting? It often looks complicated because Heroku doesn’t have static IP addresses. But the solution is simple: proper CNAME + redirect. In this article, we show step by step how to connect domain.com to Heroku and enable SSL.
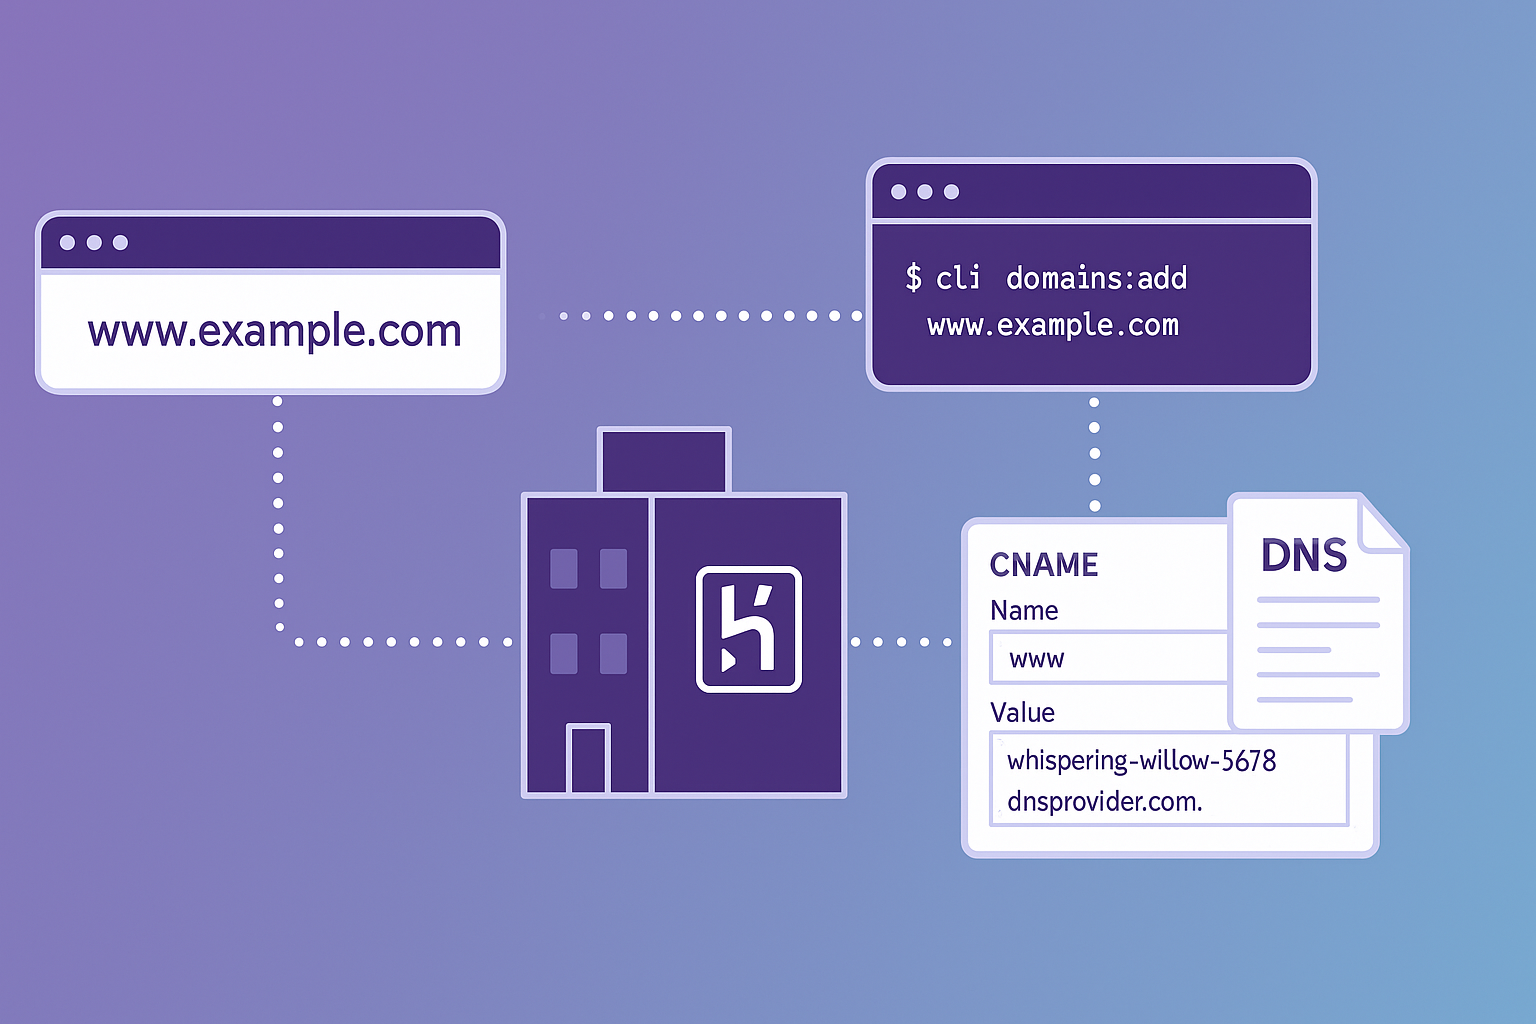
Go to Heroku Dashboard → your app → Settings → Domains. Click Add domain and enter:
www.domain.comHeroku will show you a DNS Target (for example):
metaphysical-giraffe-jdqh7wm81x4dertyqygq33mg.herokudns.comMake sure ACM (Automated Certificate Management) is enabled. This will automatically issue an SSL certificate once the DNS setup is correct.
Go to cPanel → Zone Editor and add a CNAME record:
Since domain.com cannot directly have a CNAME,
we set a 301 Redirect to www.domain.com.
https://www.domain.comRewriteEngine On
RewriteCond %{HTTP_HOST} ^domain\.com$ [NC]
RewriteRule ^(.*)$ https://www.domain.com/$1 [L,R=301]Wait 30–60 minutes for DNS propagation. Then check:
host www.domain.comIf everything is correct, you will see an alias pointing to Heroku DNS. Go back to Heroku and click Refresh ACM Status – the certificate will become active.
Will my Gmail stop working?
No. MX records remain the same. Your Gmail/company email will not be affected.
Why does SuperHosting ask for an IP?
Because their system is oriented towards A records.
But Heroku doesn’t have static IPs.
The solution is redirecting the root domain.
Can the root domain point directly to Heroku?
Only if you use a DNS provider with ALIAS/CNAME Flattening (e.g., Cloudflare).
The Network Technology team helps with:
Contact us: contact; See our web hosting;
Tip: if you work with SuperHosting and Heroku, always set up www as the main domain, and redirect the root domain – this ensures stability and SSL.